Red Velvet Ombre Cake with Cream Cheese Frosting
/
Not to be dramatic or anything but this cake was the bane of my existence over the last two weeks.
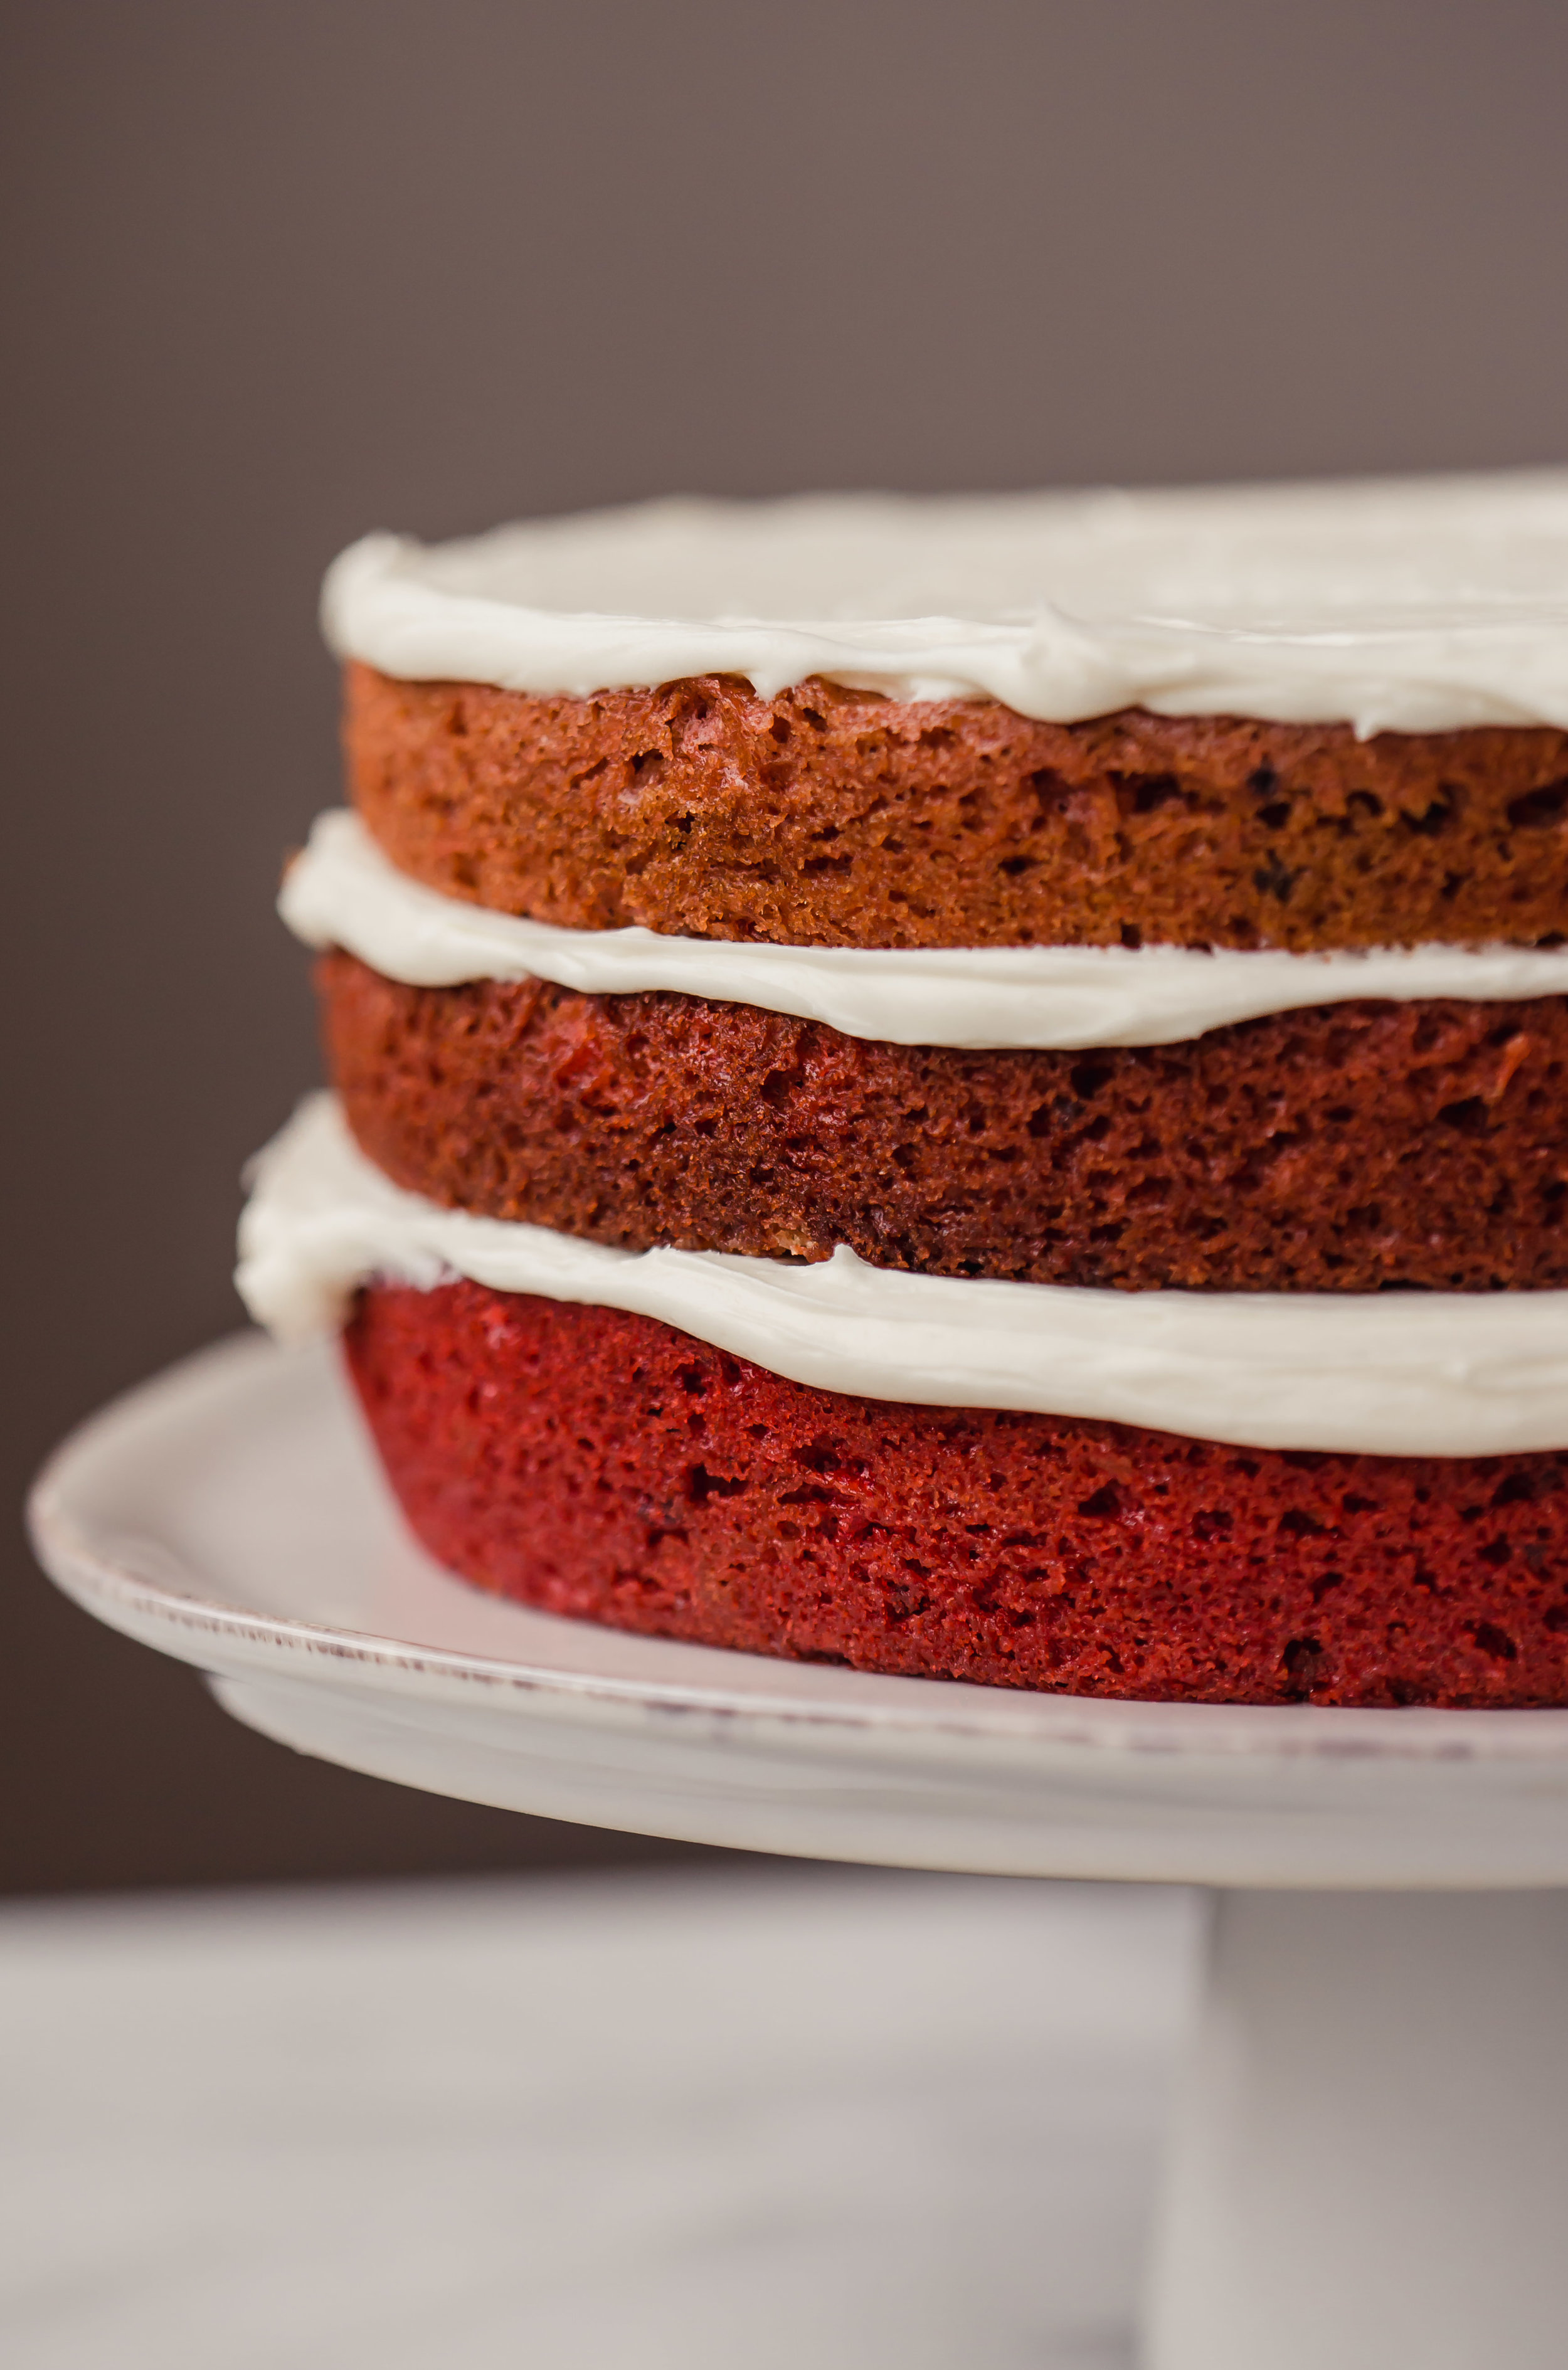
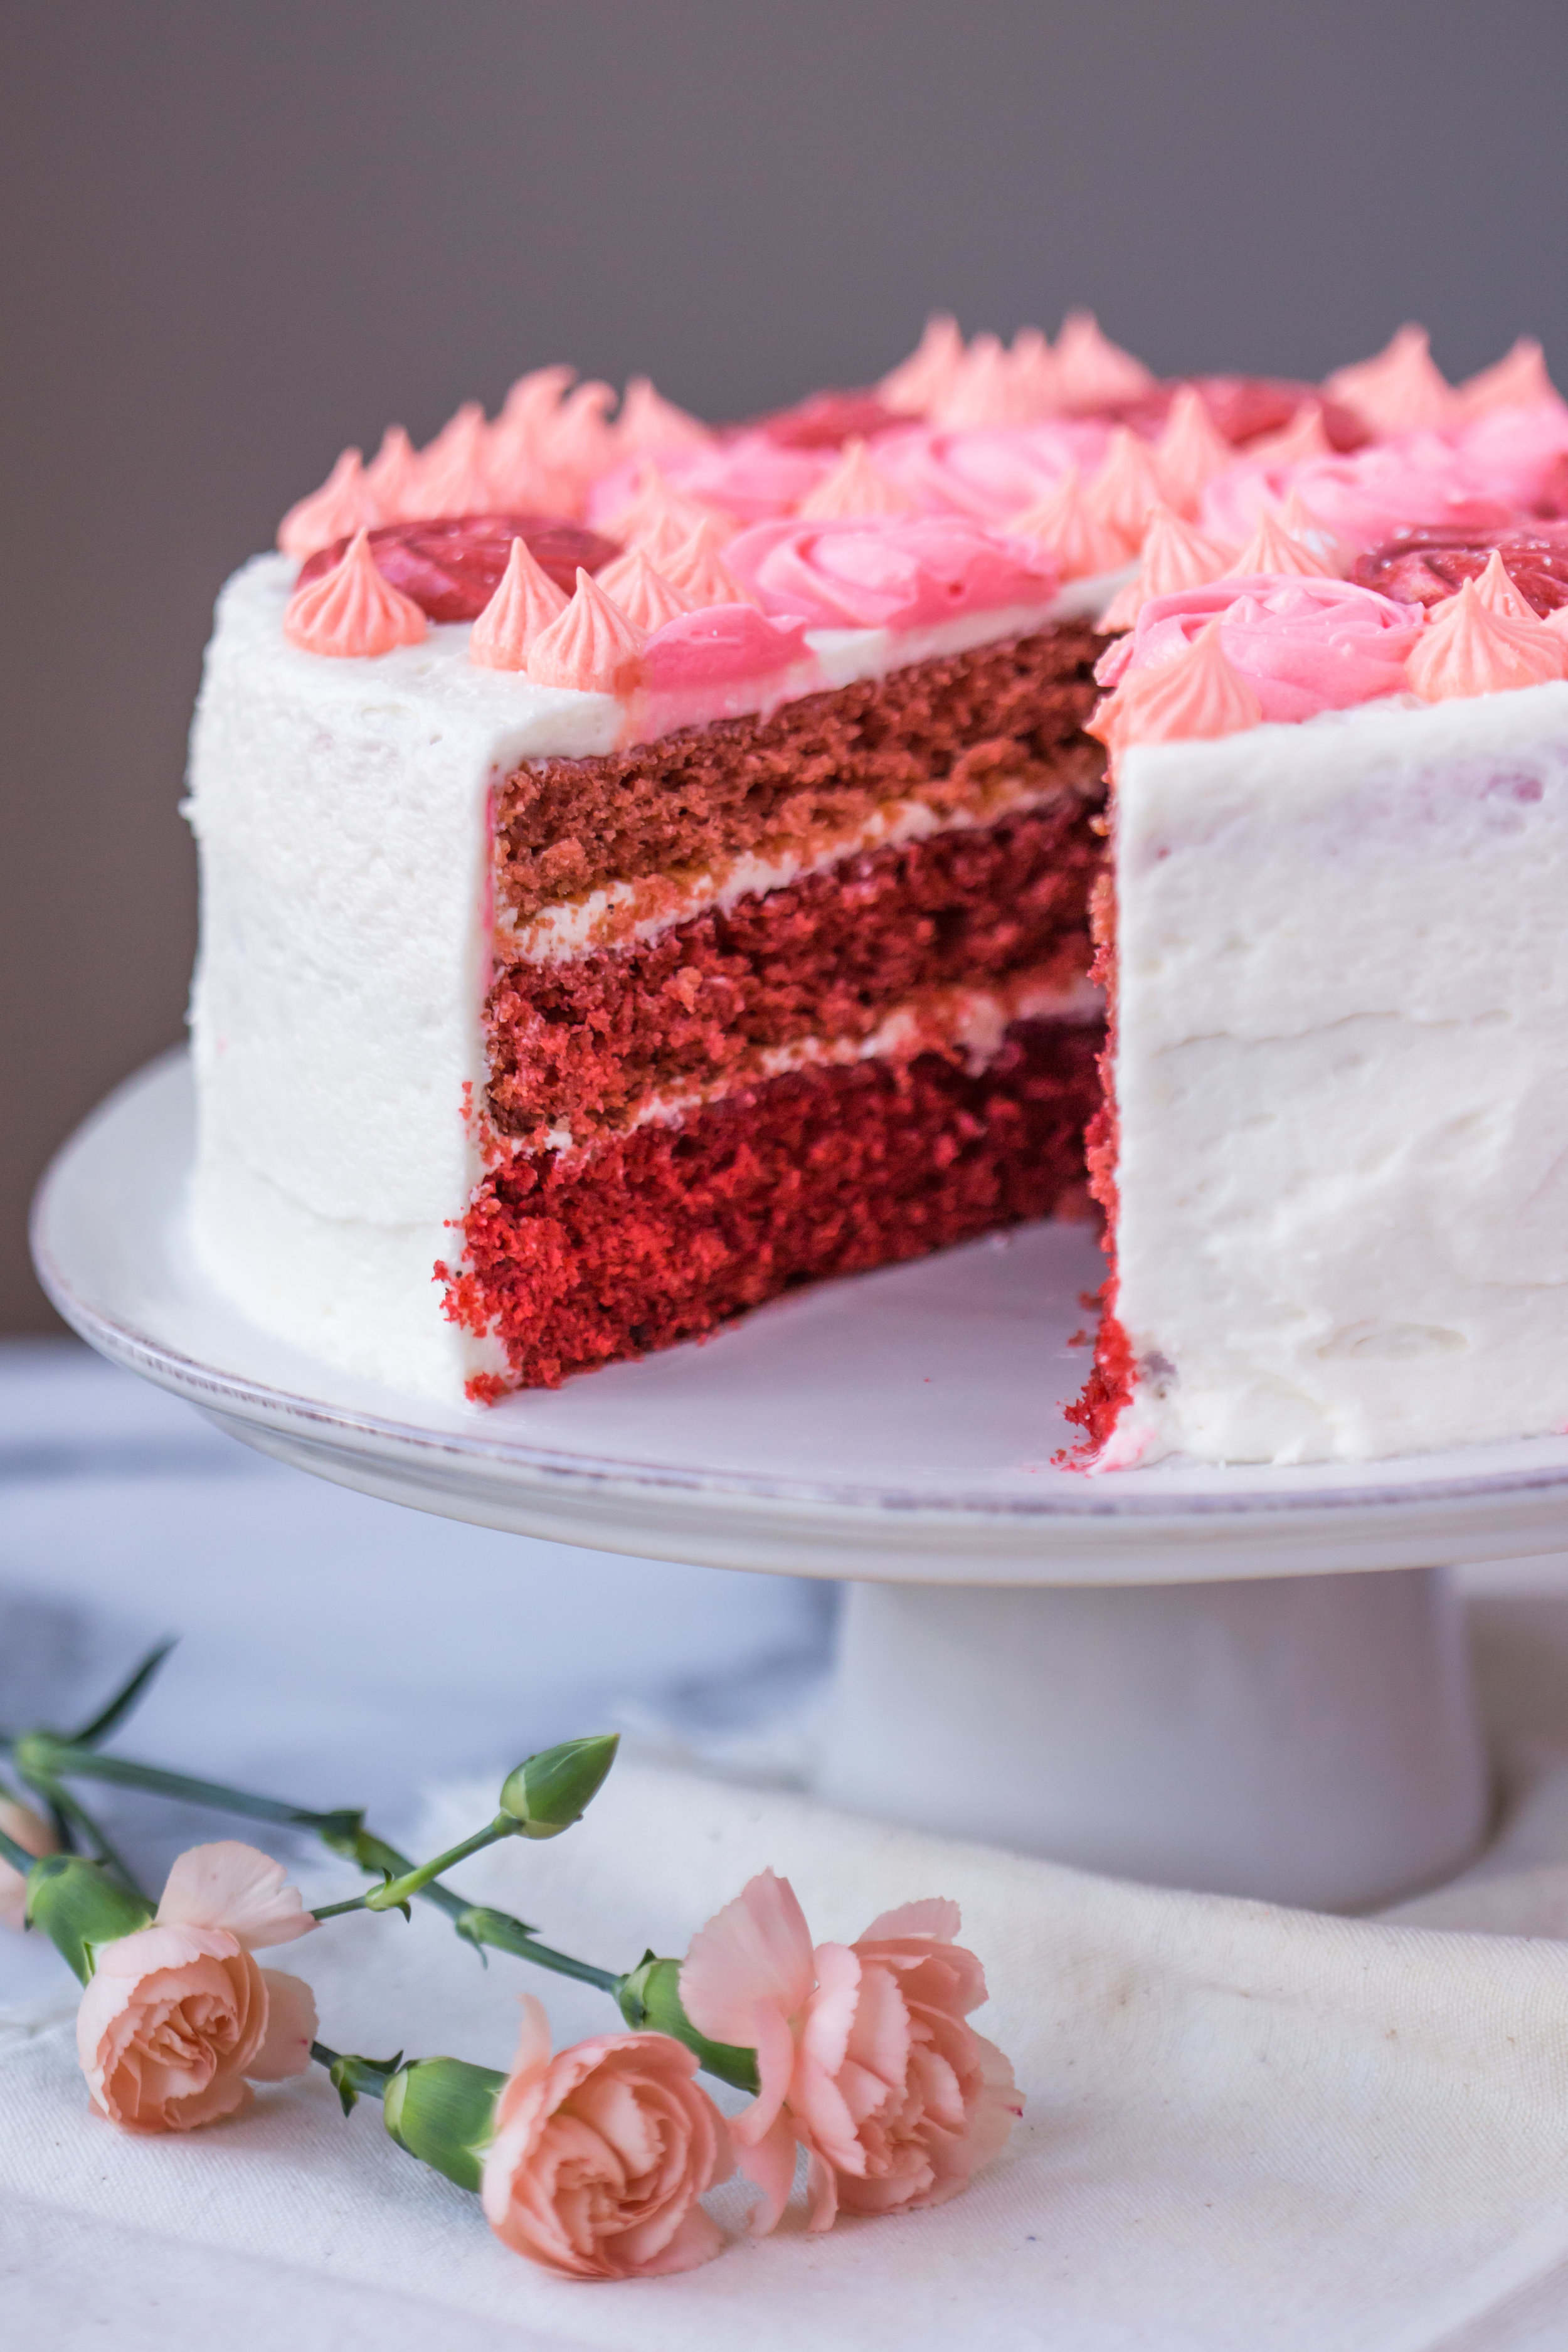
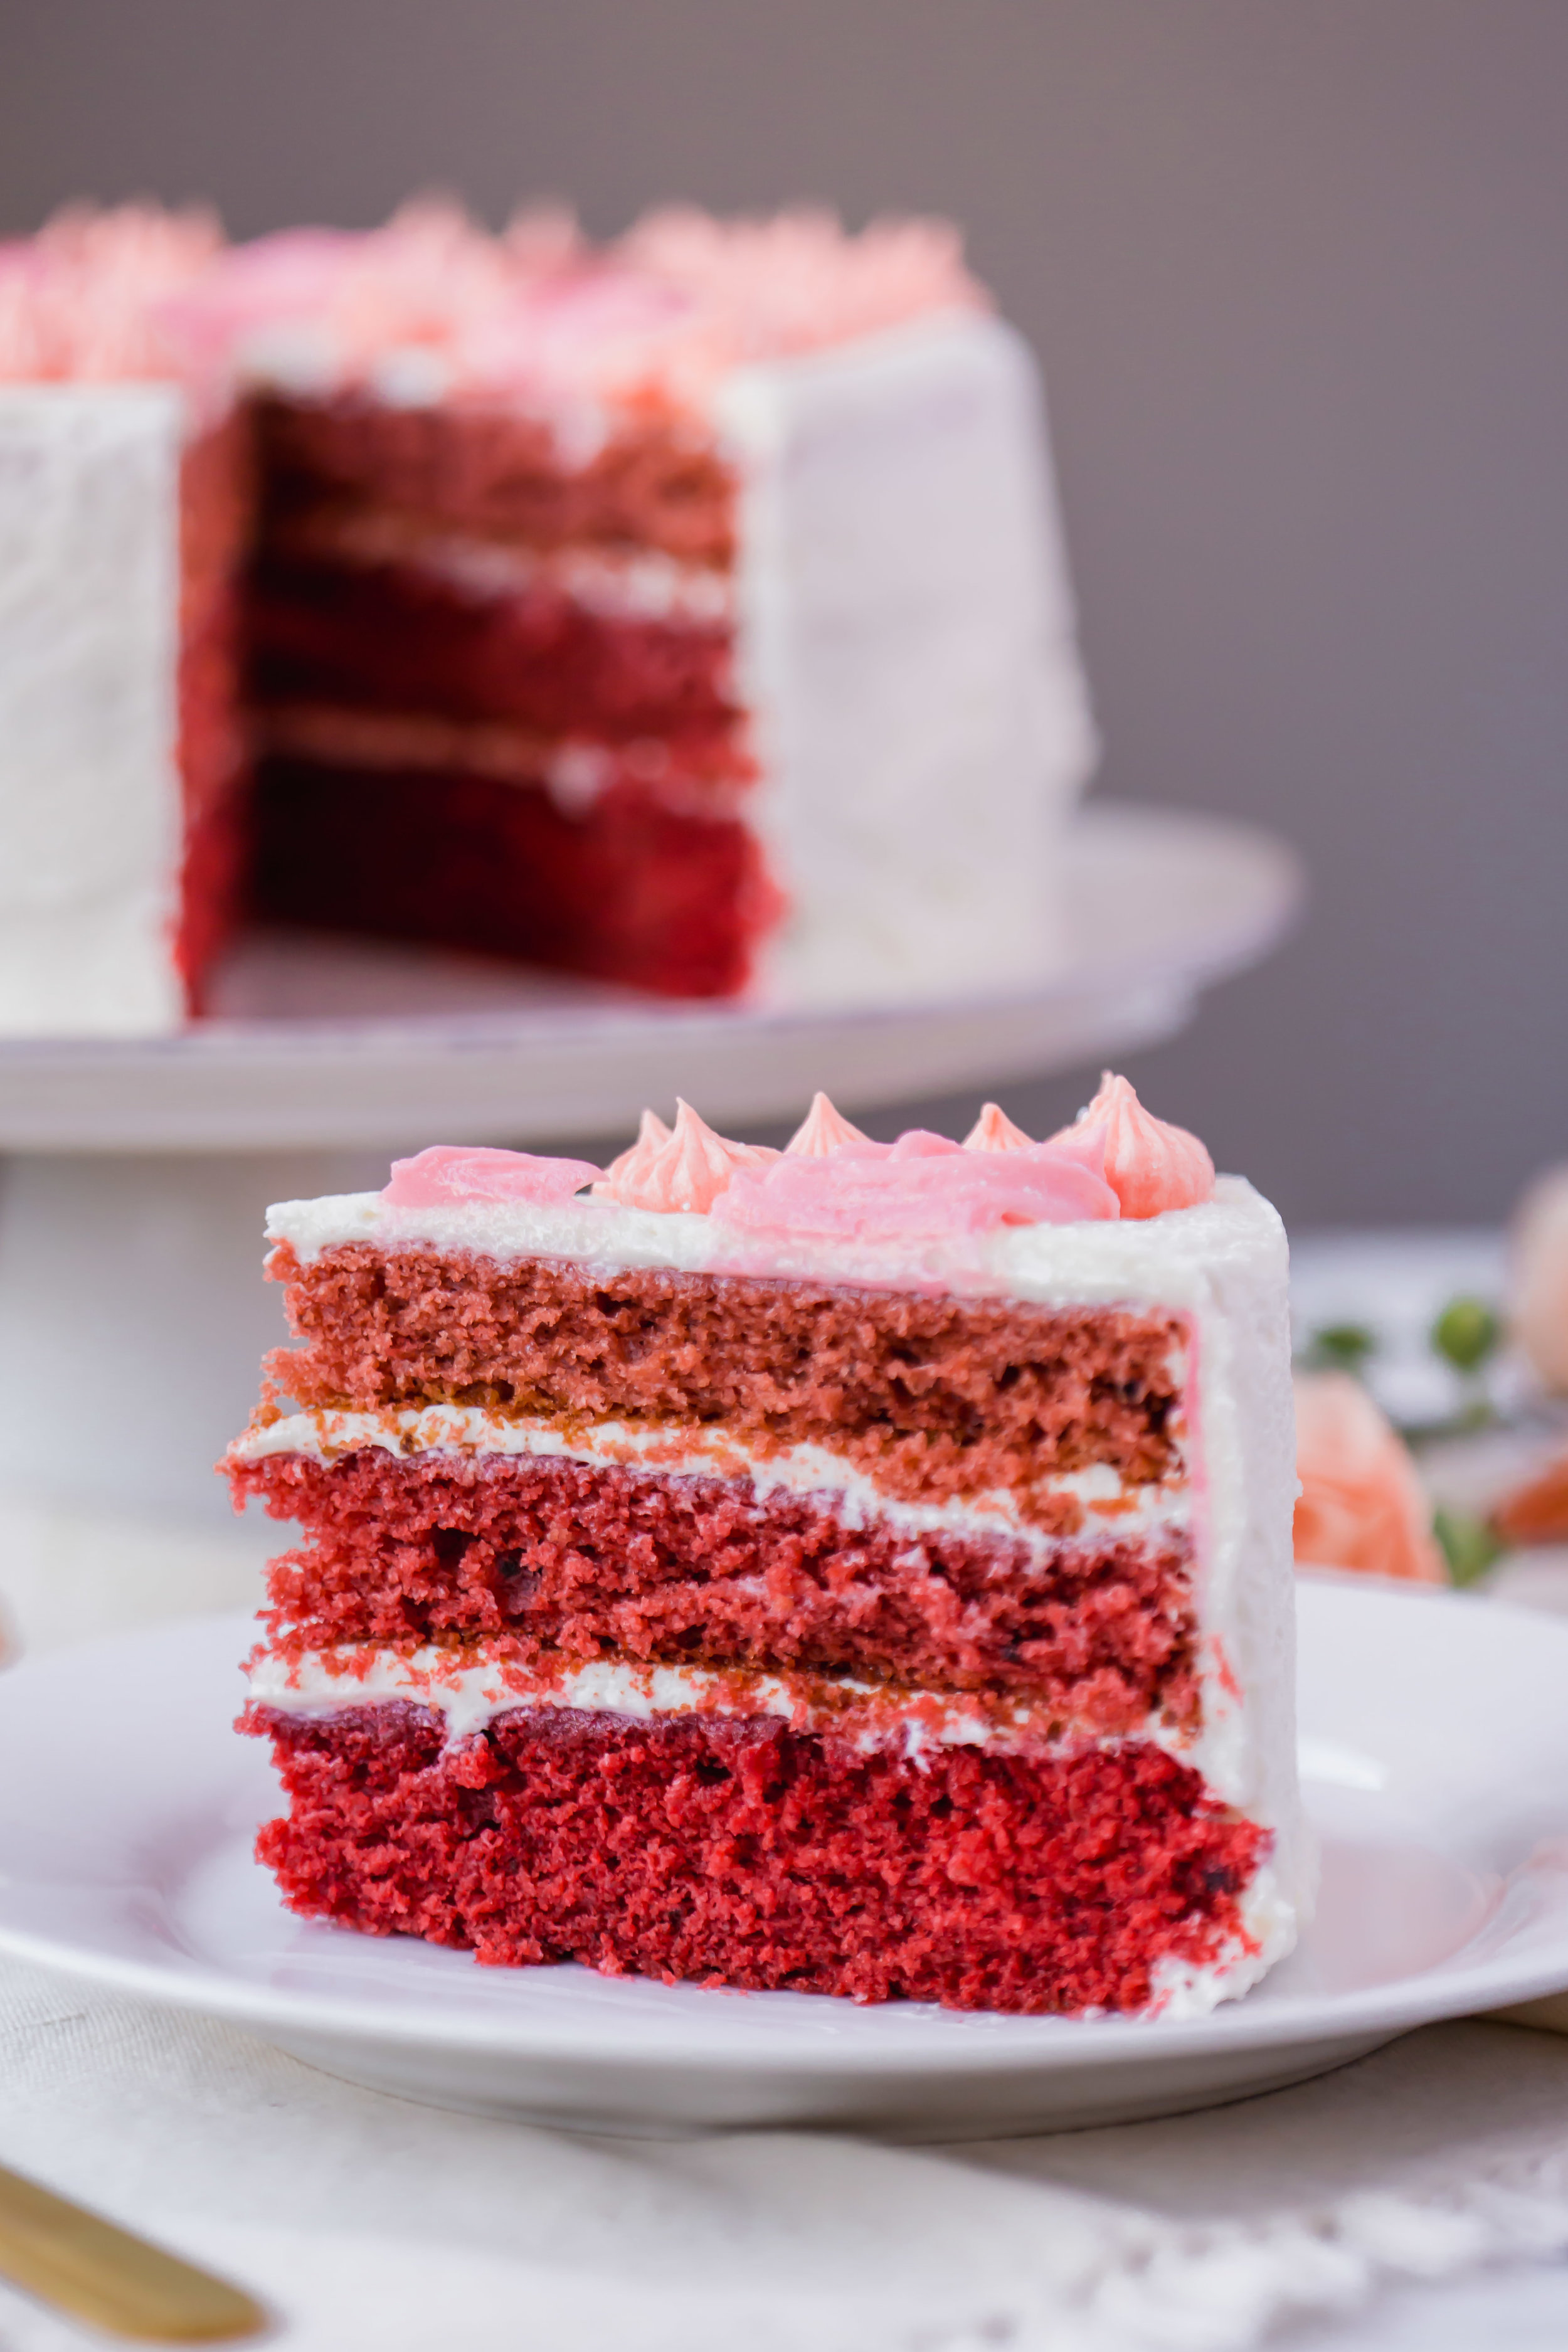
Attempt #1: The small test run of this cake recipe came together perfectly, and I was able to move on to the full cake version much quicker than I had anticipated. The cake baked evenly, which resulted in beautifully, flat layers!! I am still so thrilled I was able to make a flat cake, because I have never been able to do it before! The cream cheese frosting had just the right amount of almond extract to give it that extra “pop”. So naturally I was pretty pumped with how things were turning out, that is, until I cut the cake. The cake colors were so blahhhhh. However, the cake still tasted wonderful and moist (the only time I will use that word is to describe food, otherwise that word is gross and I will never use it normal conversation). Since the colors didn’t have the wow factor I wanted, I had to move onto attempt #2. But in the meantime I took attempt #1 to work (because I often get asked why I don’t bring in more of my creations to share), and everyone LOVED it.
Attempt #2: The color was much better this time! But then the icing started being fussy on me. It was probably because the cream cheese was still slightly chilled when I made the icing, so the whole thing turned into a clumpy mess. I tried in vain to fix the problem, attempting to add an additional ombré effect to the icing to hide the clumps. But eventually the iced cake looked like a little girl’s baby shower had thrown up on it because it was a horrible light pink color. So, frustrated I had wasted an afternoon on my rare weekend off, I scrapped off all of the icing, put it back in the refrigerator, and watched The Office to help lift my spirits. First world problems, right?
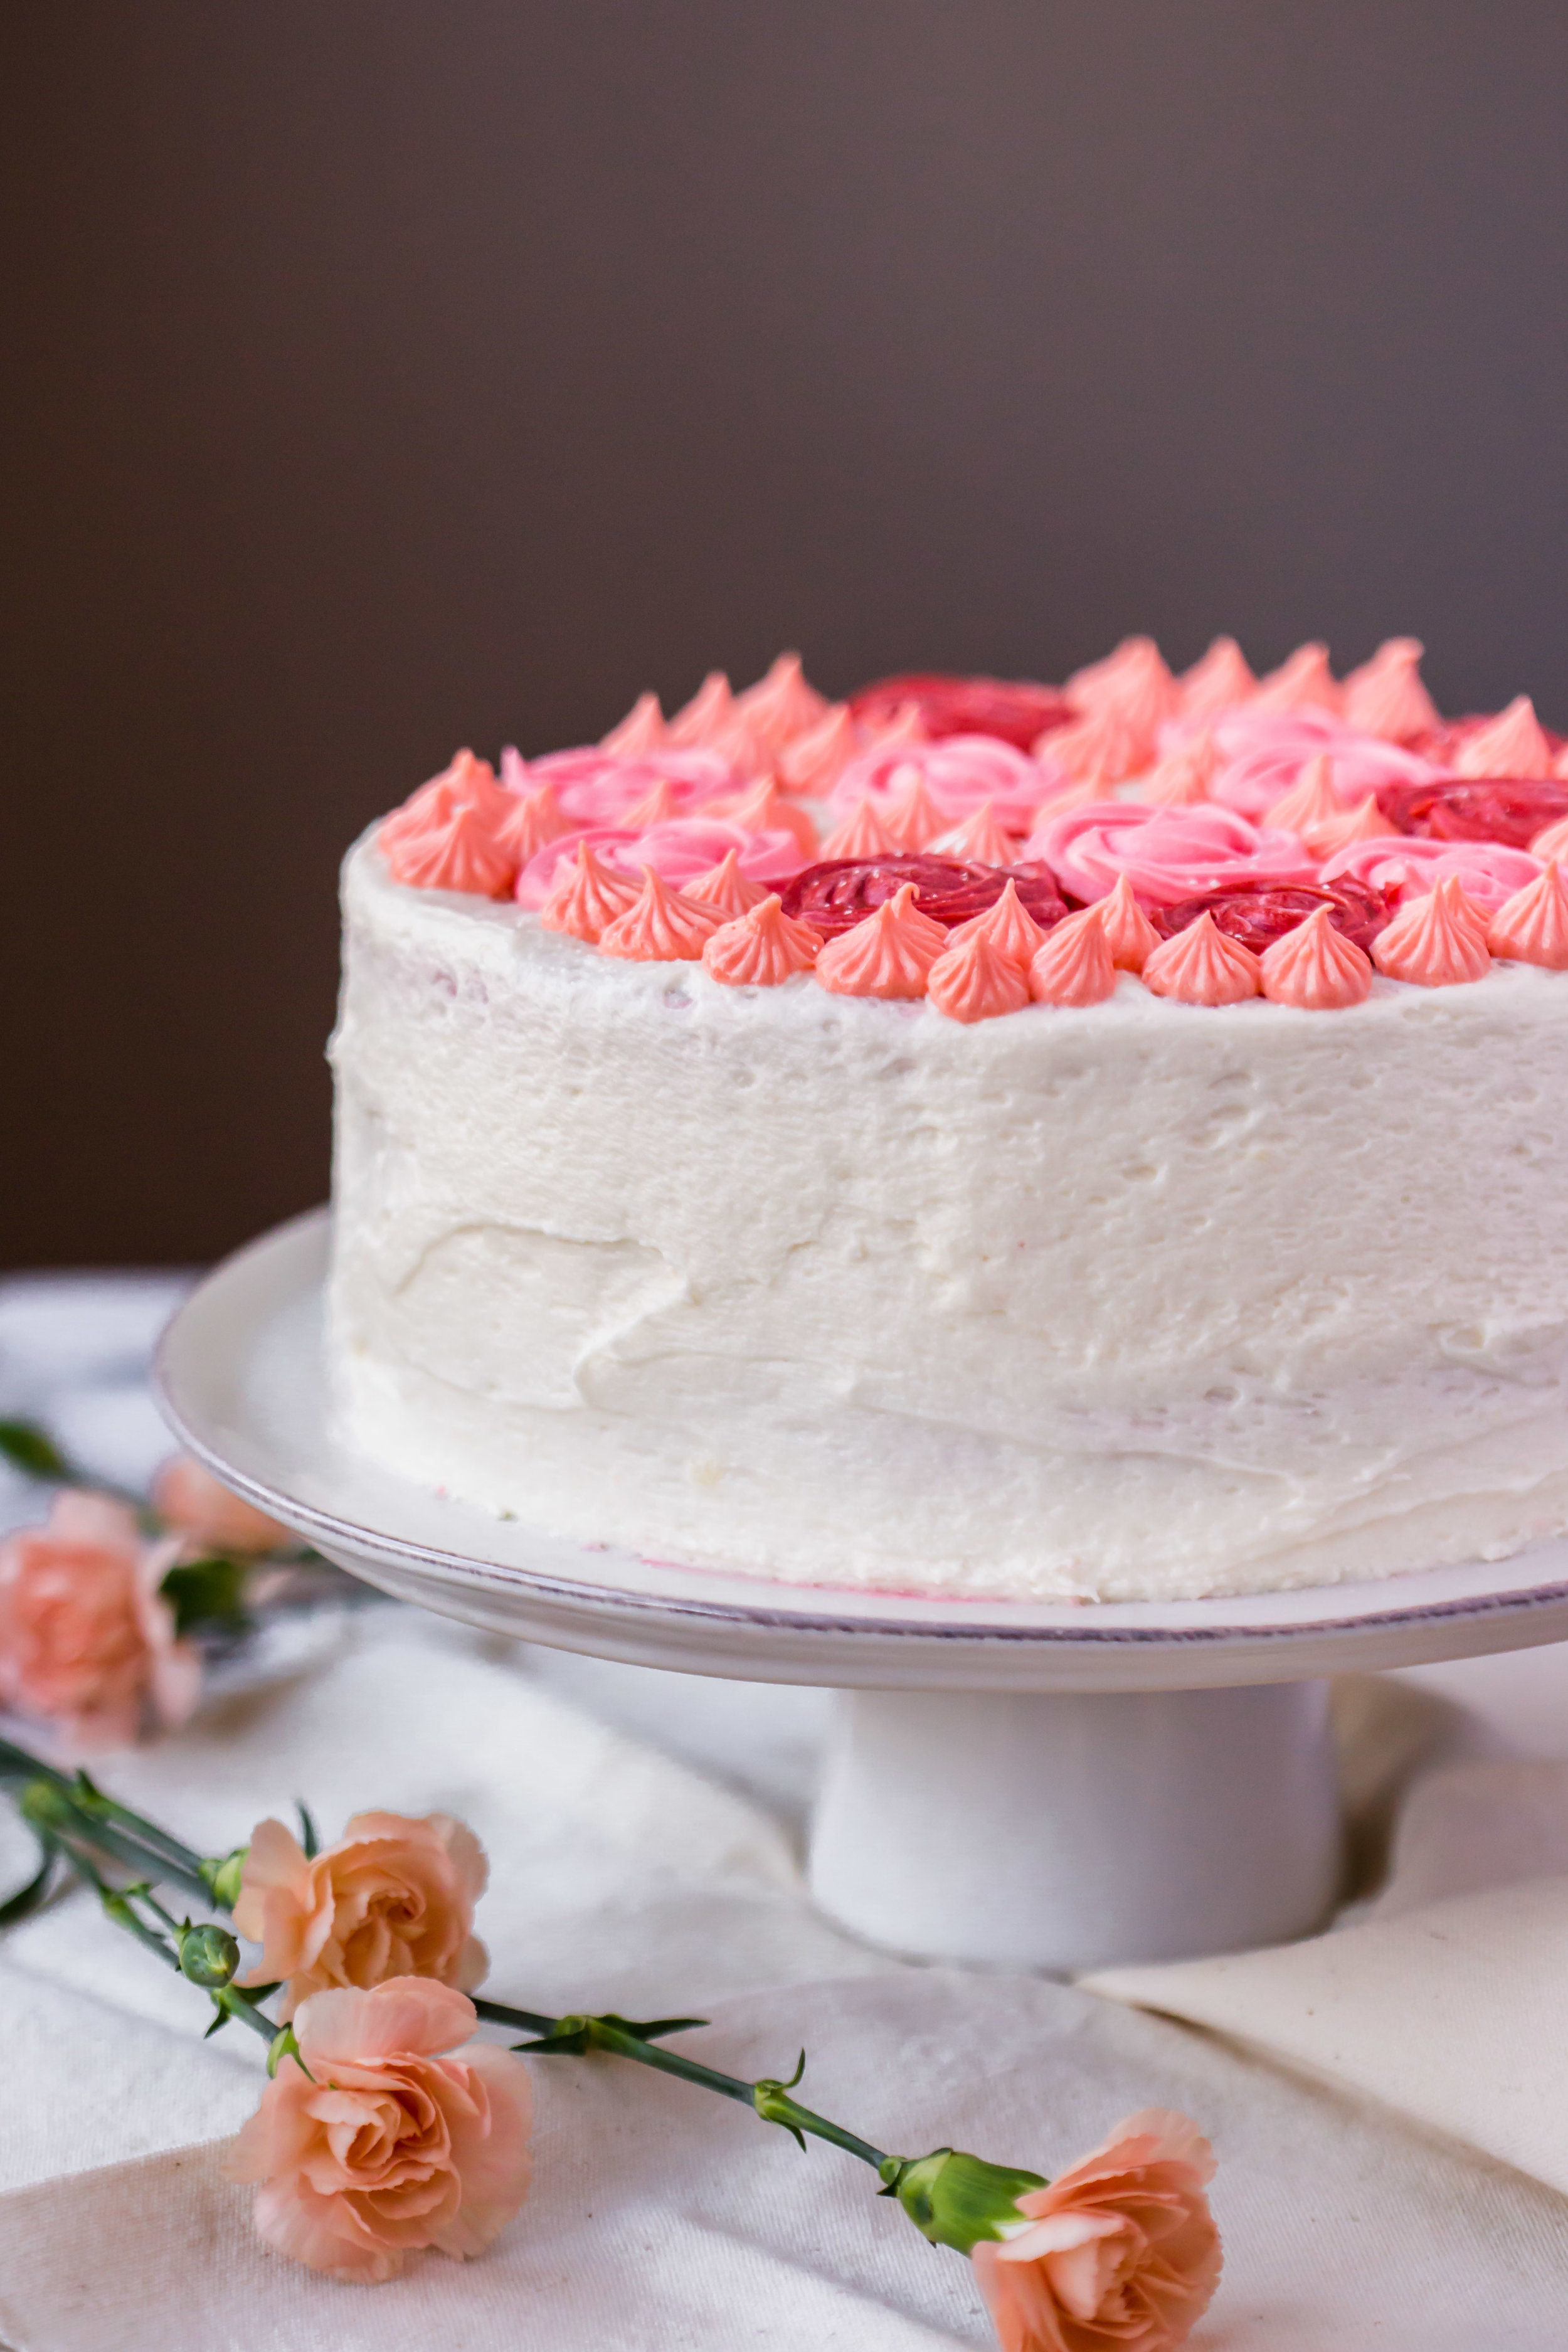
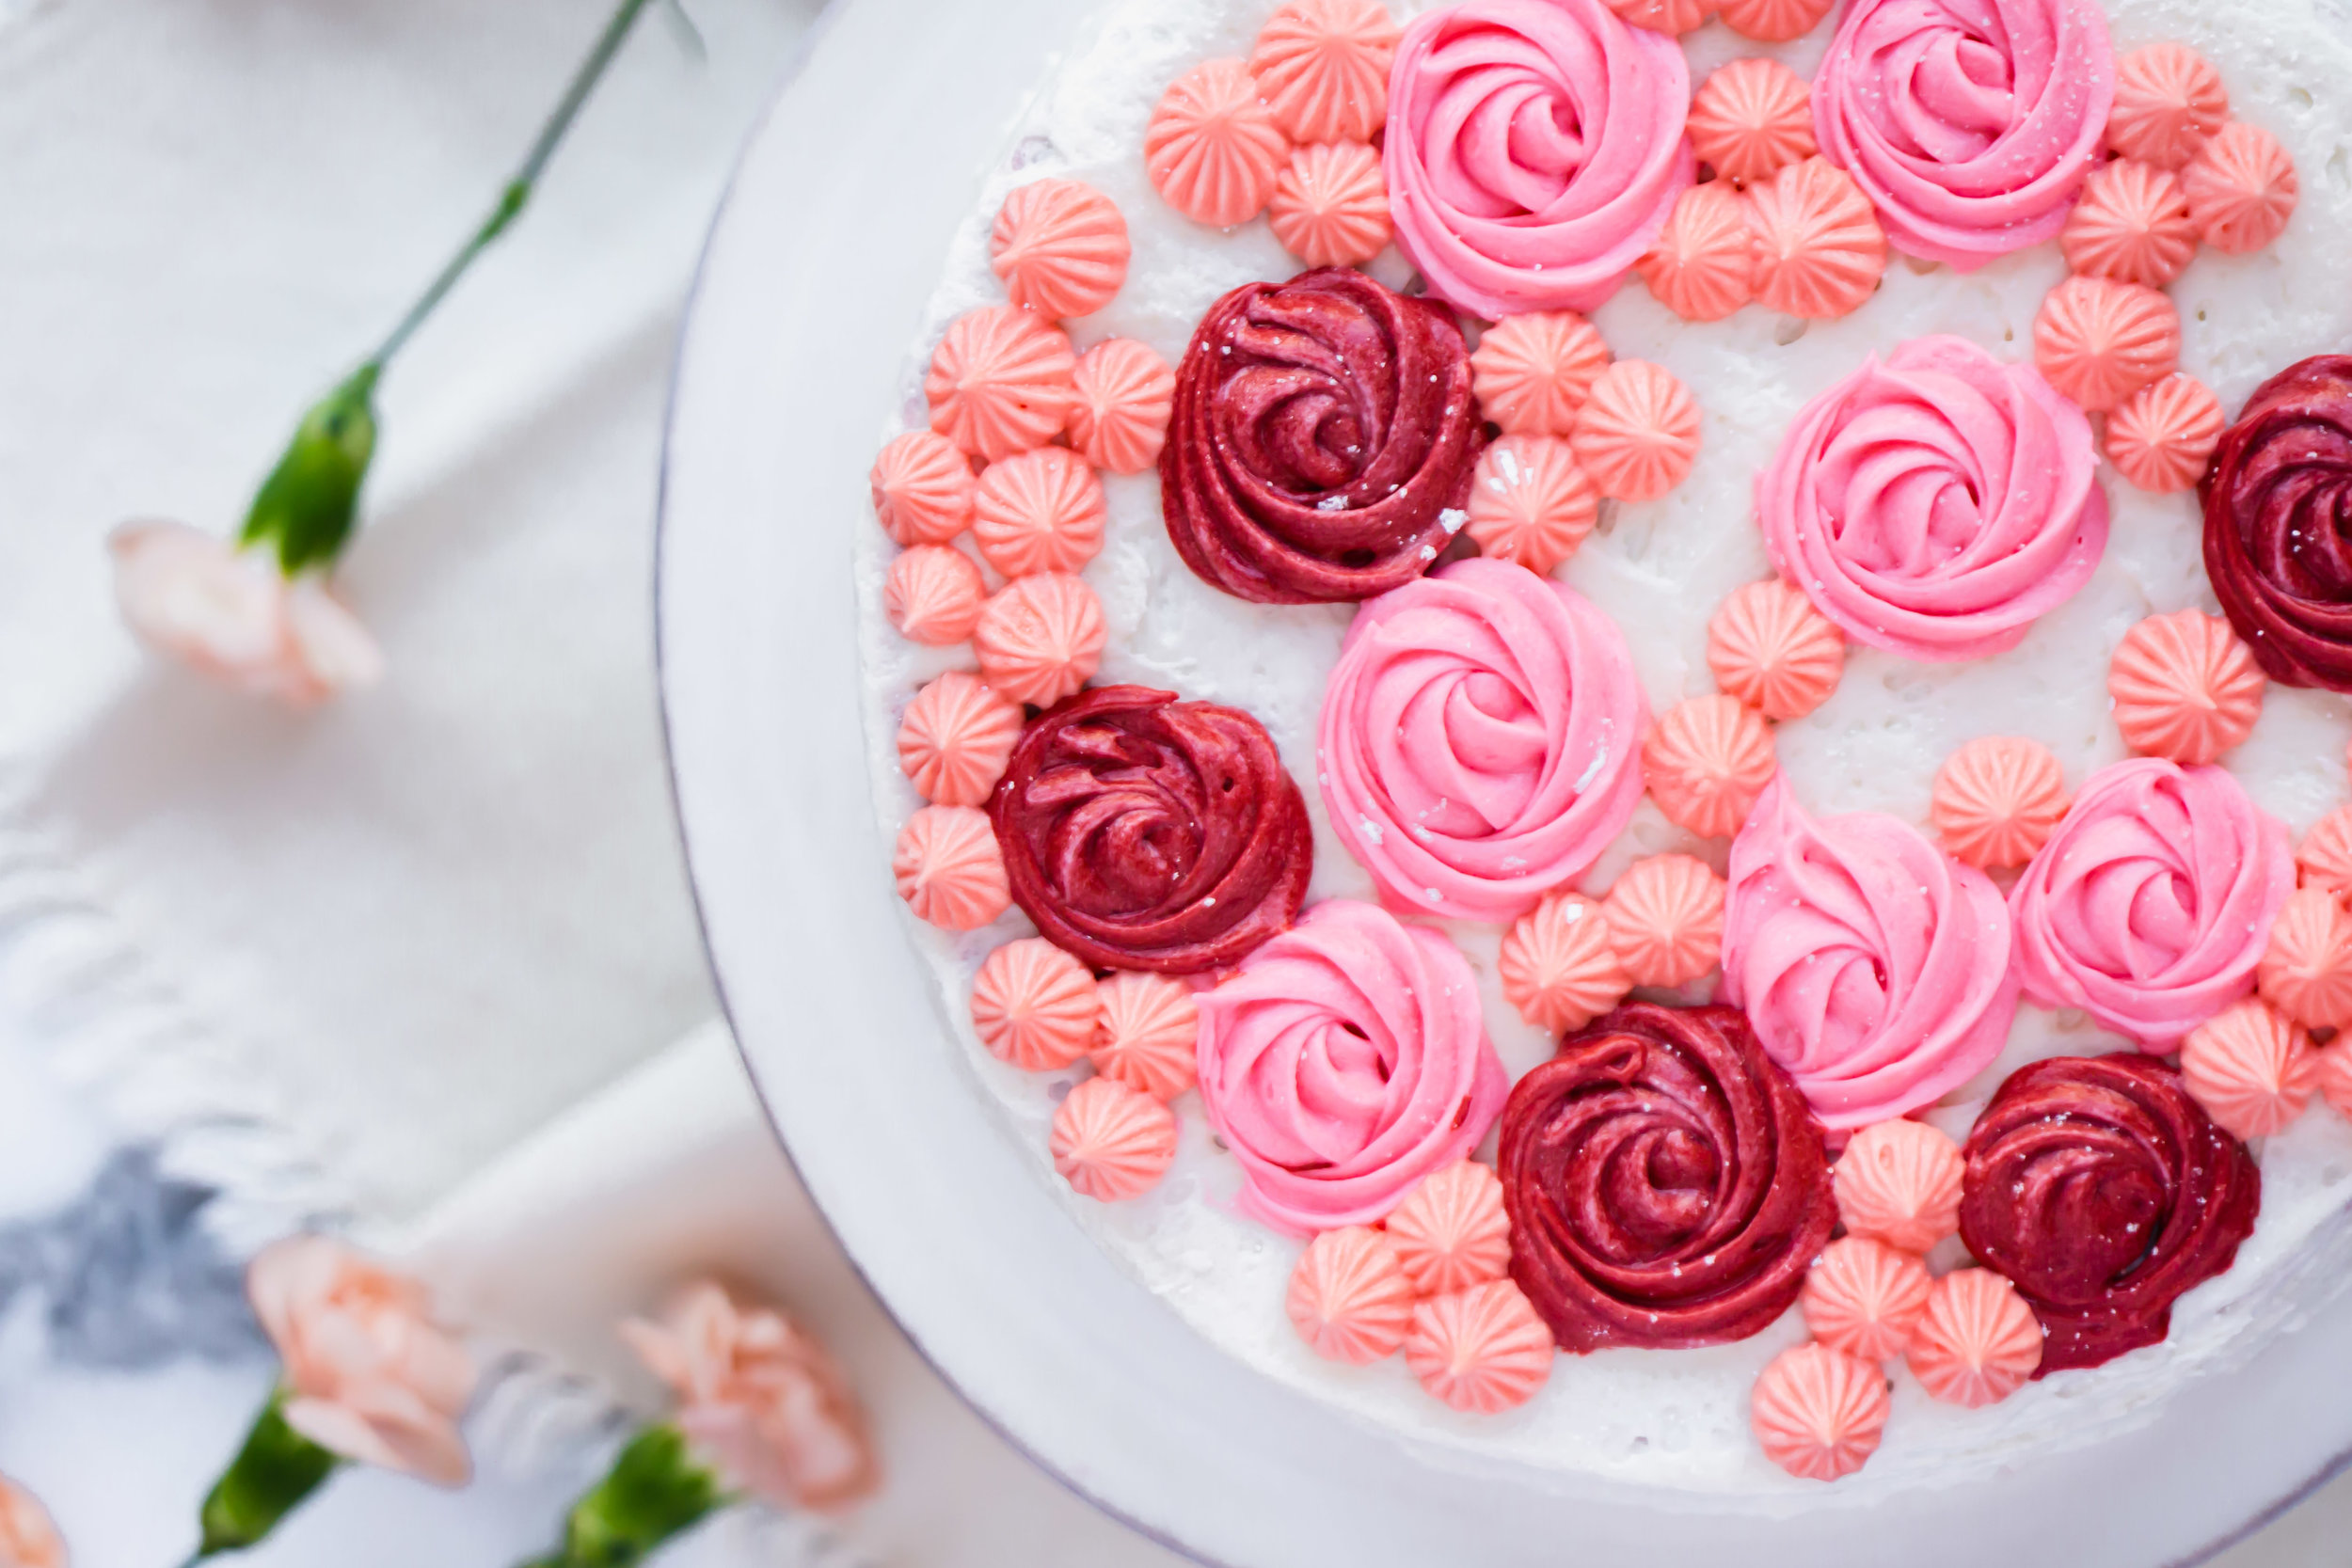
Attempt #3: This time I made sure the butter and cream cheese were as room temperature as possible, even placing them next to the radiator for a short while. I whipped the crap out of those two ingredients, added a little less almond extract (which I added back later bc I love me some almond extract). The icing turned out whipped, light, and fluffy. PERFECT! Carefully I iced the cake so as to avoid the disaster of yesterday. Finally, everything about the cake was just as I had hoped it would be. With Molly Yeh as my inspiration, I still need to work on photographing cakes, but for now, the taste and look of my first cake creation was a success!

Red Velvet Ombre Cake
Prep time:
Bake time: Serves: 16Cake Ingredients:
- 1/2 cup unsalted butter, room temperature
- 1 1/2 cups granulated sugar
- 2 eggs
- 1/3 cup oil
- 1 teaspoon vanilla
- 2 1/2 cups all-purpose flour
- 2 Tablespoons cocoa powder
- 1 teaspoon baking powder
- 1 teaspoon baking soda
- 1 teaspoon salt
- 1 cup buttermilk
- 1 teaspoon white vinegar
- Red food coloring
Frosting Ingredients:
- 10 oz cream cheese, room temperature
- 10 Tablespoons unsalted butter, room temperature
- 5 cups powdered sugar, pre-sifted
- 1 1/4 teaspoons vanilla extract
- 1/2 teaspoon almond extract
Instructions:
- Using nonstick spray, grease three 9" pans* Line the bottoms of the pans with a piece of circle parchment paper, and set aside.
- Preheat oven to 325 degrees.
- Fit an electric mixer with a whisk attachment. Cream together the butter and sugar until light and fluffy (~3-4 minutes).
- Add the eggs one at a time, beating after each one.
- Mix in the oil and vanilla extract.
- In a separate medium bowl, whisk together the flour, cocoa powder, baking soda, baking powder, and salt. Set aside.
- In a pyrex measuring cup, stir together the buttermilk* and white vinegar.
- With the mixer on low speed, add the dry ingredients and the milk in 2-3 alternating batches, and mix until just combined.
- Fold in 1/2 teaspoon red food coloring. Pour 1/3rd of the cake batter into one of the cake pans. Set aside.
- Fold in 1 1/2 teaspoons red food coloring into the remaining cake batter, and pour 1/2 of the batter into the next pan. Set aside.
- Fold in 2 teaspoons red food coloring into the remaining cake batter, and pour into the last pan.
- See baker's notes for tips on how to get the cake layers to rise evenly. Bake for 30 minutes until a toothpick inserted in the middle comes out clean.
- Allow the cake to cool for a few minutes in the pan. Run a knife along the edge of the cake to release it from the side of the pan.
- Invert the cake layers on cooling racks (this helps further flatten the cakes). Allow cakes to cool completely before icing.
- Make the icing: Using an electric mixer, cream together the cream cheese and butter on medium speed for 5 minutes. It is very important that these are at room temperature!!
- Whisk in the powdered sugar, vanilla extract, and almond extract.
- To assemble cake: Spread a layer of frosting on top of the first cake layer. Place another layer on top of that, and spread on another frosting layer. Place the last layer on top. Use an offset spatula to frost the cake smoothly all over. Decorate as desired!
*Baker's Notes
- If you don’t have three 9” baking pans, just put the cake batter in the refrigerator until the next pan is available.
- If you do not have buttermilk on hand, substitute by combining 1 cup milk + 2 Tablespoons lemon juice.
- How to create a perfectly flat cake layer:
1. Cut a towel into strips wide enough to cover the side of your cake pan, and fit the length to encompass the entire pan. Personally, my towel strips weren’t long enough to circle the pan, so I safety-pinned a small additional piece on to get it to the total length I needed. Once you pour the batter into the pans, wet the towel strips, circle tightly around the cake pan, and safety pin closed. This will help the cake to bake evenly.
2. Next, using an offset spatula, smooth the batter in each pan.
3. Finally, hit the bottom of the pan against the counter a couple times to get rid of any air bubbles.